Part 2 - Walkabouts
Maptiles are fun and all, but drawing walkabouts is even better! Walkabouts are sprites that "walk about" on maps. They can represent heroes, NPCs, Treasure chests, or anything else that you want to preform some sort of action.
By the End of This Section you Should...
- be able to draw walkabout sprites using the sprite editor
- be able to make and customise 16-colour palettes
Walkabouts[edit]
Walkabouts are 20x20 pixels (the same size as a maptile) and consist of 8 frames: 2 frames of movement in each cardinal direction. It's possible to have more movement frames, but that requires advanced plotscripting that we won't get into until later. In editor version Callipygous (the most recent at the time this was written) there is already 3 built-in sets of nice-looking walkabouts. We'll still be drawing our own, however.
Drawing Walkabouts[edit]
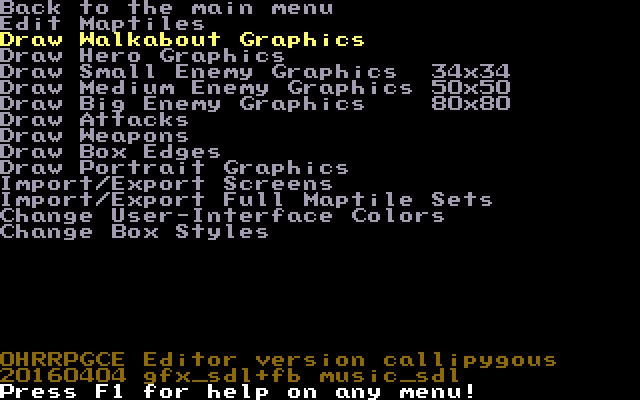
Fire up CUSTOM and load your project. Go back into the "Edit Graphics" menu.
This time, go to the "Draw Walkabout Graphics" section.
Well would you look at that! There's already 3 sets of walkabout sprites here! (And they aren't half bad looking, either) But it wouldn't be a tutorial if we didn't learn how to do anything, so we're going to draw one of our own. Using the arrow keys, scroll all the way to the bottom and keep scrolling. A menu reading "Add new graphics?" will pop up. Select "Yes." And would you look at that! We've got a fresh new set of walkabout graphics! Scroll your cursor to the right until you get to the slot marked "Down A"
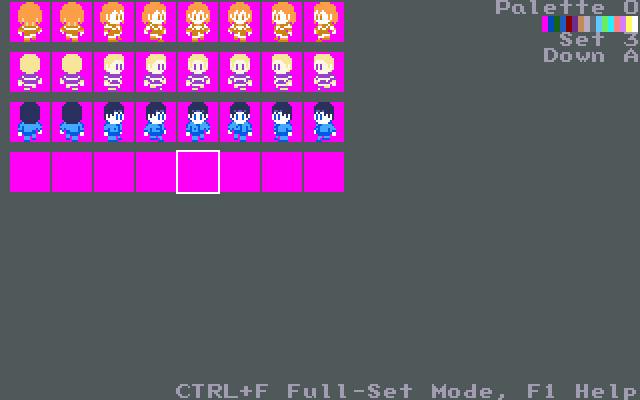
Press enter, and you'll pull up the sprite editor. This is very similar to the tile editor, but it has some big differences.

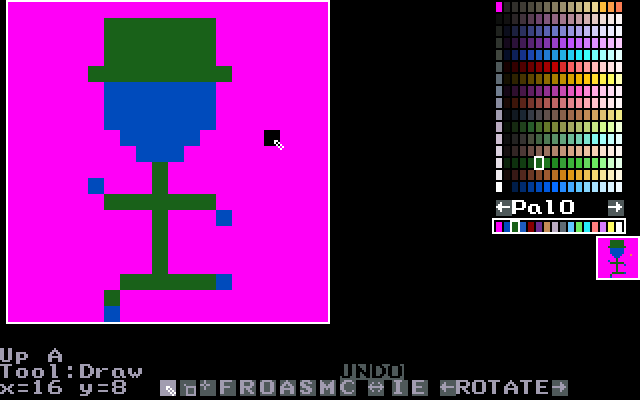
First of all, you may notice that there is a little bar filled with exactly 16 colours on the left (right under where it says "Pal0"). Sprites, unlike tiles, are limited to 16 colours. Now, I know what you're thinking: "16 colours? You already limited me to 256! How am I supposed to work with 16 colours?" Well I'm glad you asked, my good chum. There's plenty you can do with only 16 colours. In fact, you'll probably end up using less than 16 anyways!
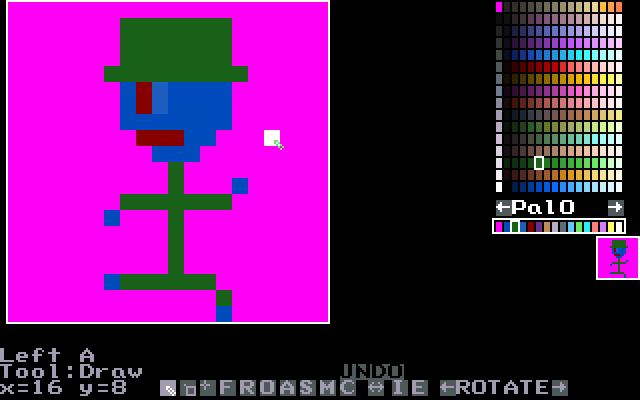
But I digress. Let's get back to making that walkabout, shall we? Start by picking a colour from your 16-colour palette. Don't try to pick one from the master palette, or it will replace the currently selected slot of the 16-colour palette! Draw your little dude, using any colour you'd like from the 16-colour palette.

There we go! The first frame of our little dude is finished. And darn if he isn't a handsome young lad. Press escape to exit the sprite editor, then use CTRL + C and CTRL + V to copy the sprite over into the "Down B" slot. Open up the sprite and flip it horizontally, either by clicking the flip button or by pressing backspace.

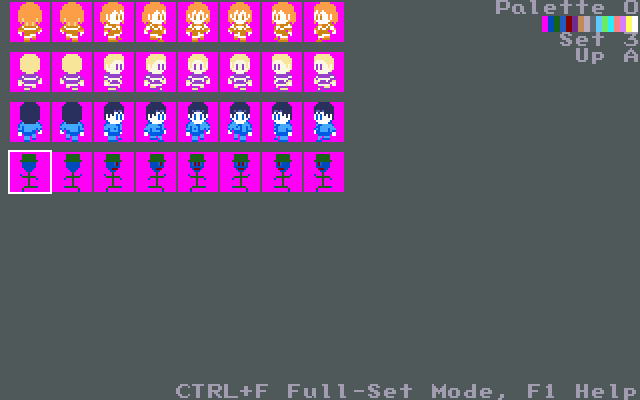
Now our little dude has a walking animation! Next, copy those two sprites to the "Up A" and "Up B" slots, respectively. In both of the sprites, colour in his little face with his skin tone. Now he's facing upwards!
Use similar trickery to make his right-facing sprites:

And copy + flip the right-facing sprites to make him face to the left:
The full set should look a little something like this:
Palettes[edit]
Our dapper dude is cool and all, but his colour scheme is anything but good looking. We'll fix that up by making him his very own palette! What 16-colour palettes lack in size, they make up for in numbers. You can define up to 32768 different palettes! We'll make one specially for our little dapper man.
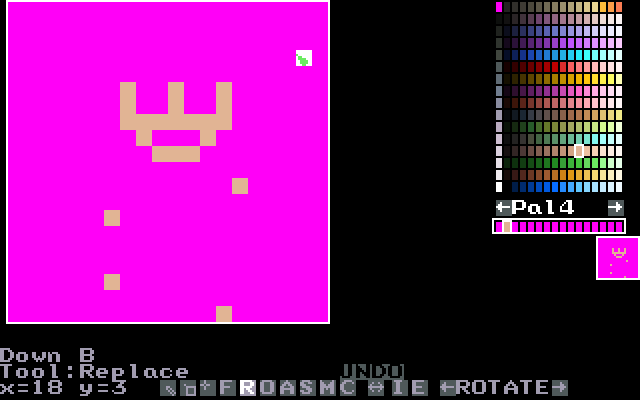
Open up one of his walking down sprites again. This time, using either the clickable arrows or the left and right bracket keys ( [ and ] ), scroll until you reach an empty palette.

Oh no! It looks like our little buddy has disappeared... Never fear! We'll bring him back by assigning some colours to his new palette. If you have a photographic memory, you'll probably remember that we used the 2nd slot for his skin tone (If not, just scroll back to the old palette for a minute). Pick the 2nd slot in the palette, then choose a suitable colour from the master palette. I'll go with a nice beige.
Pro Tip |
 |
|
You'll usually want to make your palettes before you make your sprites, and then tweak the palette as needed. |
|
It looks like our pal is starting to appear again! Repeat the above instructions for the rest of the colours in the palette, until our dude looks finished.
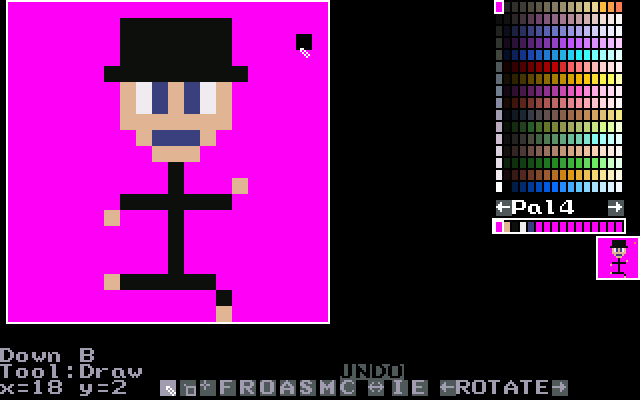
Now our little well-dressed stickman is ready to go! Try playing around with other palettes, or swapping the palettes of the premade sprites. (They're actually designed with palette-swapping in mind!)
That's it for walkabouts. In the next section, we'll be drawing hero sprites.
(Below is a download link for the project with all of the changes we've made)
Introduction | Getting Started | Artwork | Map Construction | NPCs | Tags | Making a Hero | Attacks | Items | Battles | Vehicle Use | Sound and Music | Text Boxes | Custom Menus | Slices | Plotscripting | Distributing a Game
Appendices: Keyboard Conventions | Sample Scripts

