Vehicle Use
Vehicles might seem rather complex. But, vehicles are rather easy and fun to make and use. For this section, please use SAMPLE.RPG, as I will too. The first step to making a vehicle is to decide what type of vehicle you want to make. Is it a car, a boat, a plane? Plan ahead.
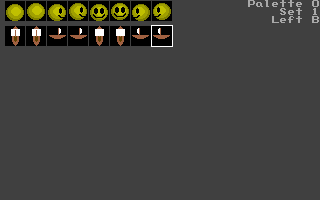
After you have planned on what you want your vehicle to be, you must draw it. You draw your vehicles inside the walkabout graphics mode. This is also where you draw your character and NPC walkabouts.
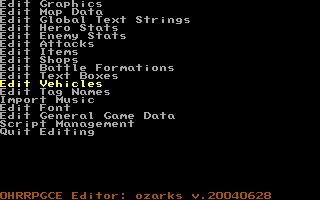
After you have drawn your vehicle walkabouts, you now have to make the vehicle's stats. To do this, go into the Edit Vehicles menu.
You should now be presented with a screen like this:

There are three default vehicles that are automatically added to every new game: a boat, an airship, and a speeder.
Under Previous Menu are the vehicle's stats. These give your vehicle its own personality. Here is what each one means:
- Name: This is the vehicle's name.
- Speed: This is the speed of the vehicle.
- Override walls: Default is to not override walls. The choices are A, B, A and B, A or B, not A, not B, neither A nor B, everywhere. This command allows you to decide what walls the vehicle is allowed to cross.
- Blocked by: Default is no blocking. The choices are A, B, A and B, A or B, not A, not B, neither A nor B, everywhere. This command allows you to tell the vehicle which types of walls block it from moving.
- Mount from: Default is everywhere. The choices are A, B, A and B, A or B, not A, not B, neither A nor B, everywhere. This command allows you to set what tiles you will be able to mount your vehicle from.
- Dismount to: Default is everywhere. The choices are A, B, A and B, A or B, not A, not B, neither A nor B, everywhere. This command allows you to set what tiles you will be able to dismount from your vehicle.
- Random battles: The choices for this command are enabled, disabled, formation N. Formation N is the formation you only want to fight while riding this vehicle.
- Use button: Choices are dismount, menu, or script N. Script N is the script to run on this button press.
- Menu button: Choices are dismount, menu, or script N. Script N is the script to run on this button press.
- If riding tag: Specific tag to set while riding. The tag is ON when you are riding.
- On mount: Choices are textbox T and script N. Textbox N is the textbox number to display, and script N is the script to run.
- On dismount: Choices are textbox T and script N. Textbox N is the textbox number to display, and script N is the script to run. (See notes.)
- Elevation: The number of pixels the vehicle is drawn from the bottom of the tile.
A and B are two special walls that vehicles have. They'll be explained later on.
Under Vehicle Bitsets... is another menu where you can set more options:
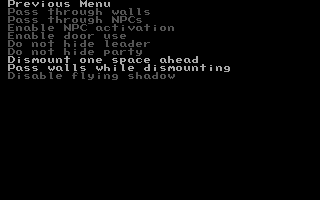
- Pass Through Walls: Vehicle passes through all normal walls.
- Pass Through NPCs: Vehicle passes through all NPCs.
- Enable NPC Activation: Vehicle can use NPCs.
- Enable Door Use: Vehicle can use doors.
- Do Not Hide Leader: Do not hide the leader when mounted.
- Do Not Hide Party: Do not hide the party when mounted.
- Dismount One Space Ahead: When dismounting, character walks one space forward.
- Pass Walls While Dismounting: Pass walls when dismounting. Use with Dismount One Space Ahead.
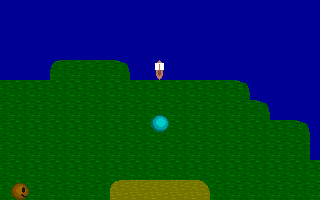
We're not going to change anything, because it is already set so now it's time to place your vehicle on a map to use. To do this, go into Edit Maps and go into the Edit NPCs mode. Yes, vehicles are NPCs on your map. Choose an NPC that is going to be your vehicle. Next, you must give the NPC-Vehicle a picture. Choose your vehicle's walkabout graphics and change your palette to your vehicle's palette, if necessary. So far, your screen will probably look like this:
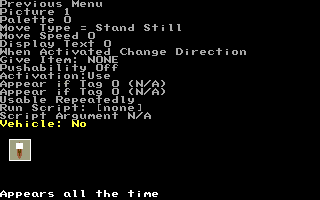
Now, we have to tell the OHR that this NPC is a vehicle. Down near the bottom, change Vehicle: No to your vehicle's name. In this example, we'll use Default Boat, which is included in newly created .rpg files. This tells the engine that this NPC is the vehicle you selected. Now, we have to place your vehicle on your map and m.
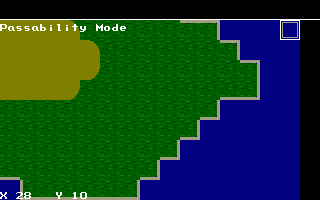
Go into the map editor and choose your map you want to place your vehicle on. Go into the Wallmap editing mode (accessible by pressing F3). We are going to make a boat. To do this, you first need to make an outline of your entire map, which SAMPLE.RPG already has, like this:
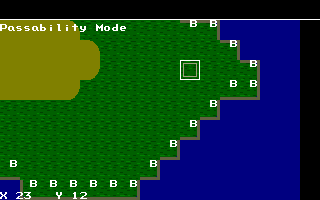
Next, you need to specify the vehicle's wallmap. You might be a little lost right now, but it will all become clear. Vehicles have two walls of their own. Wall A, and Wall B. Press Ctrl+A to place or remove wall A, and Ctrl+B for wall B. You do various things with these walls, but we'll get into that later. The Default Boat uses the B wall. Place wall B on the map along your shoreline. It should look like this:
You don't have to draw all these A/B walls one by one. The Paint tool is especially helpful, assuming that you've gone to the trouble of drawing and shore tiles. You can place an A or B wall on every copy of a tile. In wallmap mode press P to switch to the paint tool. Move the cursor over a shoreline tile. If that tile is in a layer other than layer 0 (in tilemap mode), use page up and page down to select the correct layer. Then press Ctrl +A or Ctrl+B to process the whole map. The box tool is also useful.
Now, all we need to do for the finishing touches is to add the boat. Press F5 to go into NPC Placement Mode (remember, vehicles are NPCs.) Switch to the NPC that is the vehicle and place it in the water next to a piece of shore. You have created a vehicle. Go into Game.exe and try it out.
Let me explain what we just did. In the vehicle Default Boat's bitset, see how the two bitsets, Dismount One Step Ahead and Pass Wall While Dismounting, are on. If you tried the RPG with the vehicle, you found out that if you pressed space, you would get on the boat. You may have also found out that if you pressed space while facing the shore, you got off and walked forward one space.
Notes[edit]
NOTE: The Pass Walls While Dismounting bitset is important to boats. If the Pass Walls While Dismounting bitset was off, you wouldn't be able to get back on land. You would try to move forward one space, because the Dismount One Step Ahead bitset was on, but you can't. That's how important the Pass Wall While Dismounting bitset is to boats. If you made an airship, that wouldn't matter.
NOTE: If your vehicle can use doors and you have a Dismount Script, the Dismount script runs AFTER you use the door.
NOTE: When you use the plotscript command dismount vehicle, the pass walls while dismounting and the dismount one space ahead bitsets don't work.
Keyboard Shortcuts | Getting Started | Making Maptiles | Making Walkabout Graphics | Importing BMP graphics | Moving on to Map Construction (Using Map Layers) | Making a Hero | Battles | How to use NPCs and Tags | Adding, Removing, Swapping, Heroes | Animating Maptiles | Vehicle Use | Stun, Regen, Poison, and Mute | Sound Effects | Everything You Ever Wanted to Know About Text Boxes, But Were Afraid To Ask (Portrait Boxes) | Distributing a Game
Bosses | Making Complex Attacks | Combat Dialogues | Enemies that respond to a certain attack | Ways to refer to a hero in a script | Creating Dungeons | Permanent Stat-Boosters | Conditional Door Links | Creating Cutscenes | Using the Mouse in the Game | Making Android games